We may earn compensation from some listings on this page. Learn More
ChatGPT was launched in November 2022 and gained huge popularity soon after its launch. It has several incredible features, but developers are still working to improve it and make it a more exciting AI tool.
The ChatGPT web browsing and plugins feature is the most recent ChatGPT update. This feature allows ChatGPT to access the internet and adds third-party features to the chatbot.
Open AI has launched two plugins itself, along with third-party plugins like Kayak, Zapier, Instacart, and many more. Currently, the ChatGPT web browsing and plugins features are accessible by Plus members only.
Besides, you don’t need to join the waitlist to use ChatGPT plugins. Read this guide to learn more about how to enable ChatGPT web browsing and plugins as a Plus member.
The ChatGPT web browsing and plugin feature is exclusively available for ChatGPT Plus members. If you don’t have a premium account, you first need to purchase the Plus plan for $20 per month.
After upgrading your account, you can add different plugins to your account by enabling the option in ChatGPT settings.
Follow the steps below to enable web browsing and ChatGPT plugins:
Step 1: Visit the ChatGPT website (https://chat.openai.com/) and sign into your account.
Step 2: Navigate to the Settings page from the left-side menu of your dashboard.
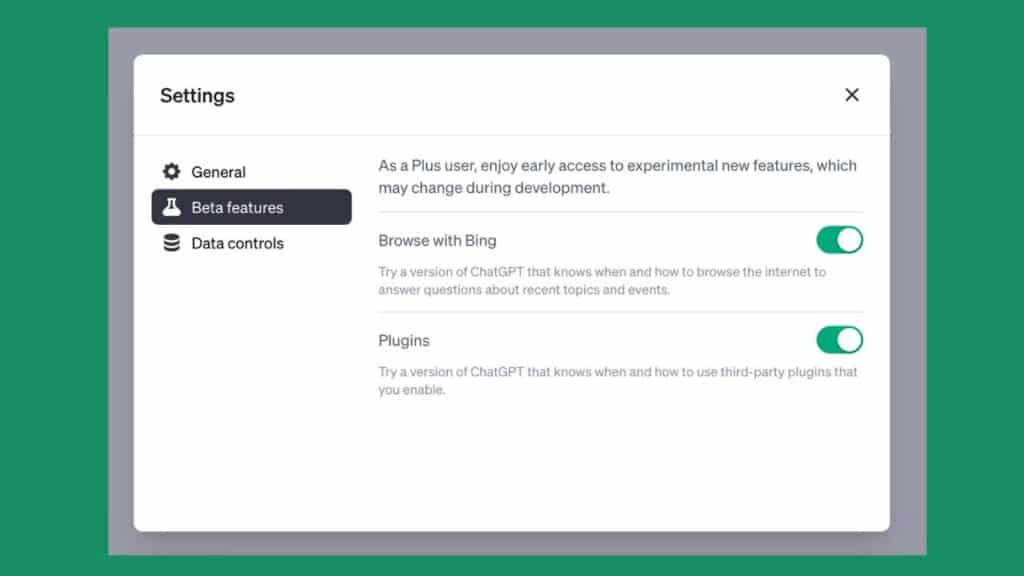
Step 3: Click on the Beta Features option to open the beta features list.
Step 4: Turn on the web browsing and Plugins features by toggling the button next to them.
Step 5: Hit the New Chat option.
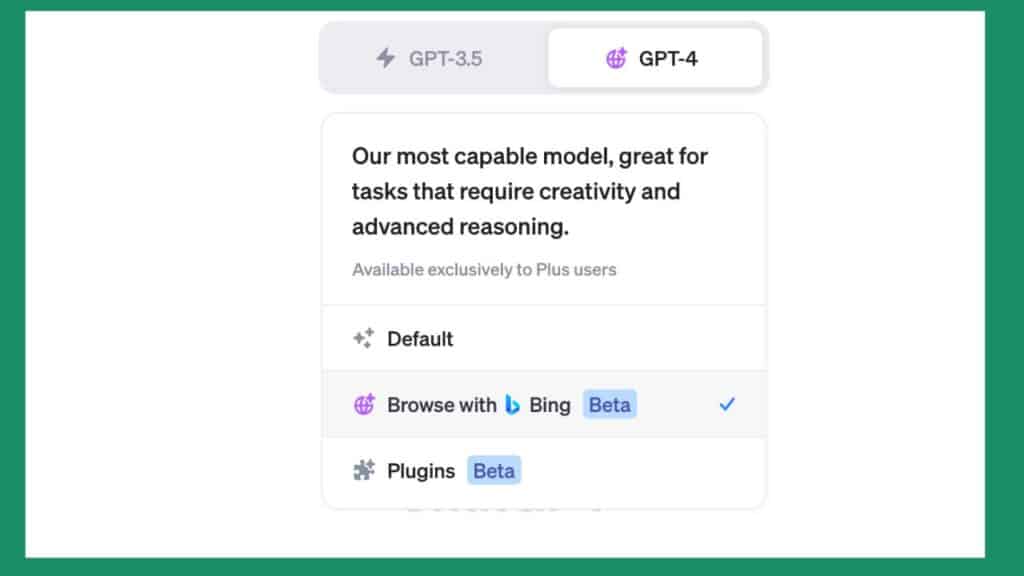
Step 6: Switch to GPT-4 mode by selecting GPT-4 on the top menu and clicking on the dropdown menu (arrow) icon.
Step 7: Select your preferred mode (Default, Browsing, and Plugins) from the list.
Like plugins, you need to separately enable the web browsing feature to access it within ChatGPT. Below are the steps to enable web browsing in ChatGPT:
Step 1: Enable the web browsing feature as mentioned earlier in this guide.
Step 2: Click the “New Chat” option to start a new chat.
Step 3: Switch to the GPT-4 model and enable the Beta Browsing option from the list.
Step 4: Ask ChatGPT a question that requires the internet to answer. For example, ask it about an ongoing event. ChatGPT will browse the internet while generating the response and also show the search terms or keywords it uses.
Step 5: Finally, the chatbot displays the results on your screen after referring to multiple websites.
You must be wondering, “Why use ChatGPT for internet browsing when you have search engines like Google Chrome, Safari, Bing, FireFox, etc.?”
Well, you can use search engines to browse the internet most of the time. But when you want real-time or the latest information from ChatGPT, the web browsing feature becomes handy.
Remember, ChatGPT’s database was last updated in 2021. When ChatGPT generates a response, it refers to its training database and gives responses based on that information. These responses can be right, but they lack recent information.
In short, if you want the latest news or information about current world trends, the web browsing feature can give you such responses. It saves you from visiting any web browser while using ChatGPT.
You can use it to brainstorm ideas, conduct research for blog post content, create a travel itinerary, research competitors, and network.
You must first install plugins in ChatGPT to start using them. So, the next step after enabling ChatGPT plugins is to install the required plugins.
Follow these steps to install ChatGPT plugins:
Step 1: After completing the steps to enable ChatGPT Plugins (explained in the previous section), you will see the No Plugins Enabled label on your screen.
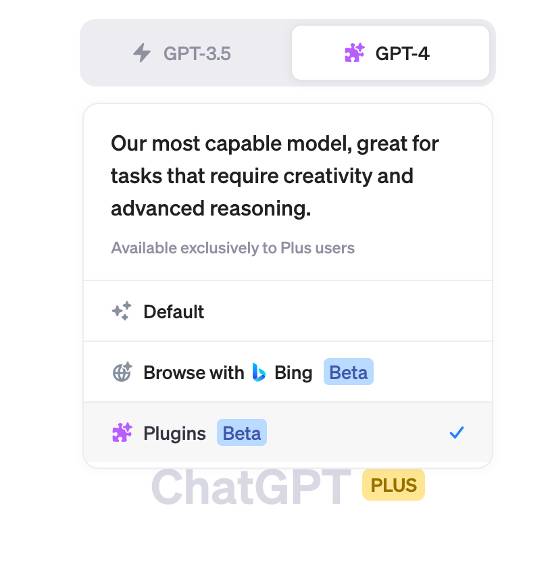
Step 2: Click the dropdown arrow next to the No Plugins Enabled option and go to the Plugin Store.
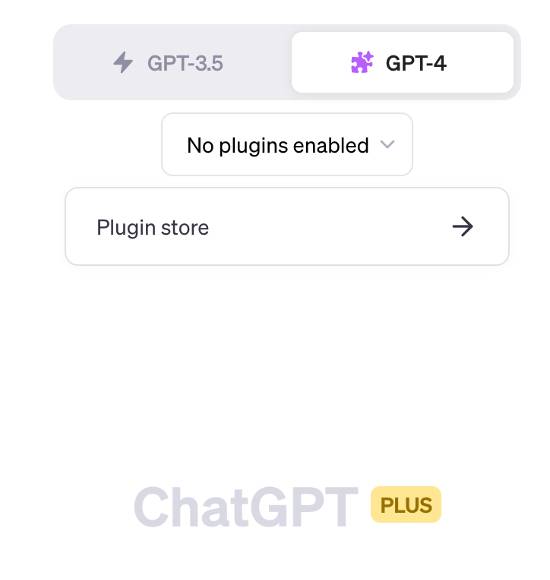
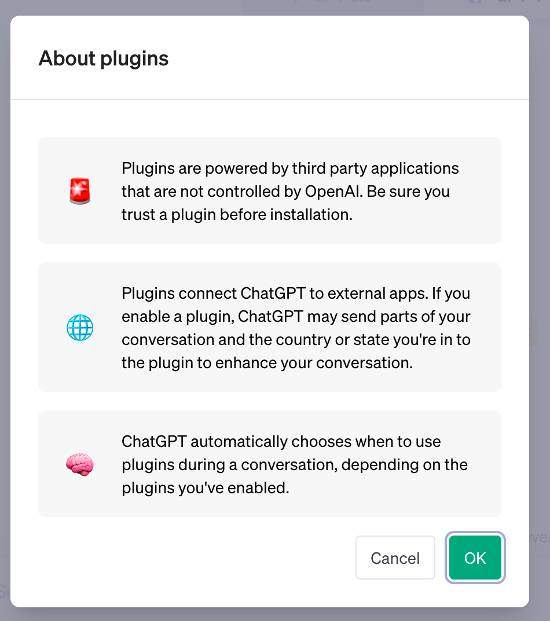
Step 3: Click OK in the popup that appears on your screen.
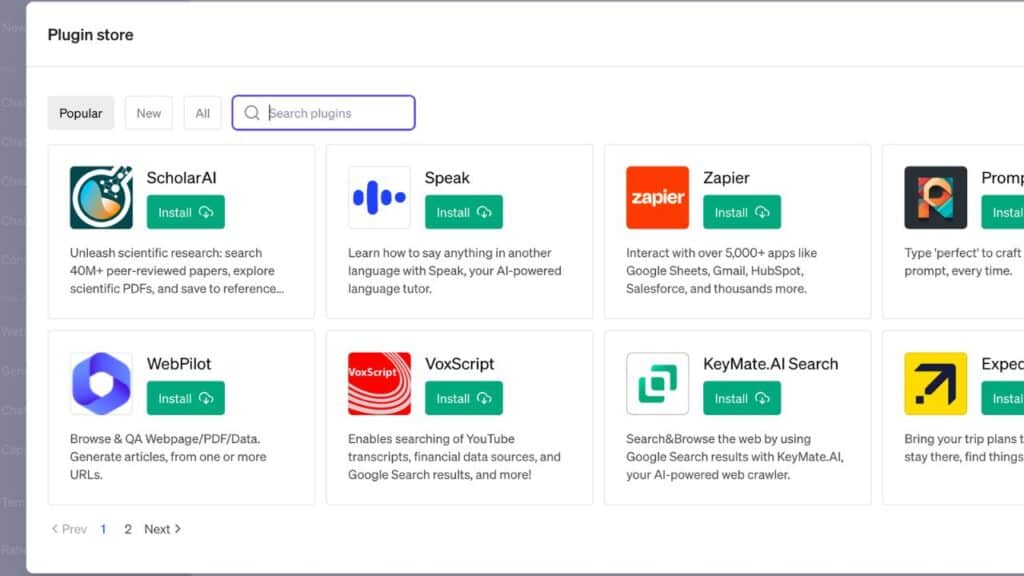
Step 4: You will see a list of available plugins on your screen. Click the Install button next to the plugin you want to install.
Step 5: The installed plugins will appear as small icons below the GPT-4 option. Click the dropdown arrow next to the plugin icon to activate or deactivate the plugins by toggling the button next to each plugin. The plugins are now ready for use.
ChatGPT won’t use the installed plugins directly to generate responses. It will use plugins when you instruct it to by writing appropriate commands.
For example, if you want ChatGPT to use the Open Table plugin to find a hotel in your locality and check for available reservations, you have to write a relevant command. Then wait for ChatGPT to do the research and display the results on your screen.
Plugins are typically third-party apps that make ChatGPT a more useful platform. They add additional features to ChatGPT, allowing it to perform activities that it would otherwise not perform.
They make third-party functionalities accessible within the ChatGPT interface without having to perform additional steps.
For example, the Wolfram plugin allows ChatGPT to accurately perform computations. You can use plugins whenever you want to access third-party features from ChatGPT without switching apps.